In this guide, you’ll learn how to build a simple shop for selling your digital goods based on a spreadsheet at no recurring costs.
You might wonder why you should do this instead of going with Shopify or one of the other quadrillion shop systems. The answer is simple:
Most of the shop systems come with monthly fees like Shopify or huge one-time investments with monthly hosting fees.
Of course, that’s fine for medium and large shops but might not be the best solution for a small shop or testing many small shop ideas.
The solution I cover comes at a low one-time cost for software and can run without any recurring fees on Netlify or Vercel. And fear not, it is simple enough that your 10yo can do it.
Overview
Before we dive into the howto, let’s start with a quick overview of the solution.
All your product data is maintaining in a simple Google Sheets spreadsheet. It also defines the template to use, basic texts, the menu, etc.
Your shop is generated by executing the spreadsheet2site CLI app. It is a command-line application, and you run it in a terminal window or alternatively as a Netlify build (more on that later).
The CLI will read your spreadsheet and merge it with a template to build your beautiful shop.
The resulting page can then transferred with your CSS and images to your regular hosting environment, or you can host it for free on Netlify.
Payment in the shop is handled by a payment and item delivery service. I am using Paddle for this as it’s one of the easiest ways to sell without monthly fees. However, you can use any other payment service like Stripe or Gumroad.
Prerequisites
For this guide, you’ll need:
- the Spreadsheet2site CLI application
- Paddle.com or any other payment service for your goods
- Netlify account for hosting the site for free (Optional)
- GitHub account for the Netlify feature (Optional)
I’ll use Paddle and Netlify for this guide as both are supported out of the box by the spreadsheet2site app.
Set Up Google Sheet
The Google Sheets is the core of your shop. Here you define the products, set the template and name your shop, etc.
Copy this Google Sheet for an easy start.
The spreadsheet has 4 sheets (and you should not rename them):
- items: your products
- siteinfo: set the template, name of the site and other settings
- filter: a way to define selection filters on listing sites. Not used for the shop atm)
- navigation: Navigation menu for the shop

Add Products
This is the place for all your products with their data. Each product is on a separate row, and the columns are accessible in the templates later.

The shop comes with a few predefined attributes:
- name: Name of the product
- teaser: A short teaser text displayed in the card layout
- description: A long description of the product. Shown in the product overlay
- Image: Link to the product image. Can be a relative path or absolute with https://
- Price: Price of the product
- Link: The buy link like the Paddle hosted checkout link
- PaddleId: The id of product in Paddle for the Paddle overlay checkout (not used in this example)
Select Template & Configure the Site
On the sheet siteinfo we can change the template, name of the shop and a few more things.
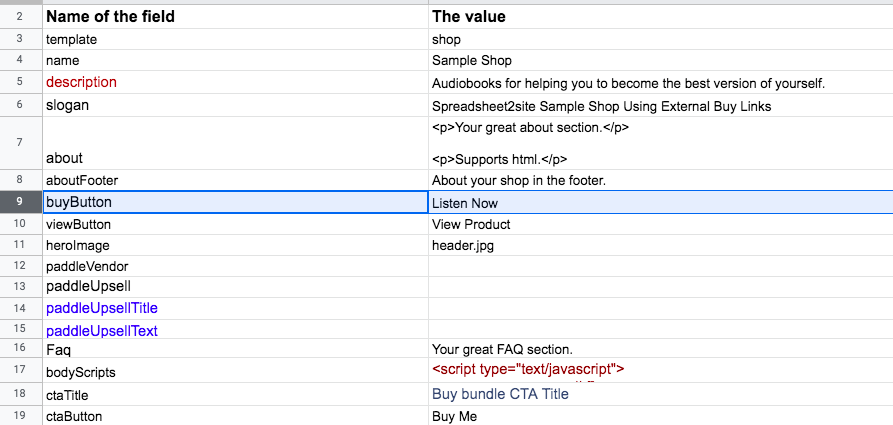
All attributes can be used in the template as simple key-value pairs. The first column is always the name and the second the value.
- template: Enter shop to use the shop template
- name: Give your site a name
- description: Short description of your site. Used as meta description
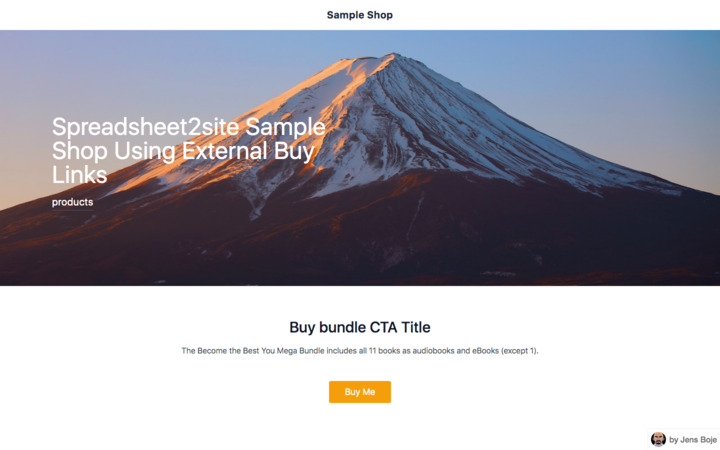
- slogan: Slogan shown in the hero
- heroImage: Image file url for the hero image
- about: Text shown in the About section. Can use HTML.
- aboutFooter: Shorter about text in the footer
- buyButton: Text of the buy button on each product
- viewButton: Text of the view button on each product
- paddleVendor: your vendor id for Paddle
- paddleUpsell: Optional upsell product for the main cta
- paddleUpsellTitle: Title of the Paddle upsell during checkout
- paddleUpsellText: Text of the Paddle upsell during checkout
- Faq: FAQ section on the main page. Supports HTML.
- bodyScripts: additional Javascript added before the body close tag. Used for analytics codes, etc.
- ctaTitle: Title for the main cta
- ctaButton: Button text for main cta
- ctaText: Text for the main cta
- ctaLink: The link the the main cta
Hosting Images
You can host your images anywhere you want use use absolute URLs for the images links. Or you can host them inside your shop site. In this case, you enter the image file name only. Spreadsheet2site will then look for the file in a media folder in the same directory as the resulting shop page.
Authorize
The CLI application needs to access the Google Sheet. To grant access:
- In the Google Sheet, click the green Share button in the top right corner.
- Add the user
spreadsheet2site-cli@spreadsheet2site.iam.gserviceaccount.comas a Viewer - Uncheck Notify people
- Clik the blue Share button
Voila, your spreadsheet is now shared with our CLI application.
Build Site
Open a terminal, navigate into your template copy and run the CLI application. Templates, CLI, and everything else is inside the download bundle you received after purchase.
We need the id of the Google Sheet to build the site. It is part of this ugly long URL of your Sheet like
https://docs.google.com/spreadsheets/d/1jcqQc3CSVctly30ORxdoovVGoF9TWi9IeQcP9wG562M/edit#gid=1493736455
The id comes after https://docs.google.com/spreadsheets/d/ and the next forward slash.
In the example above, the id is 1jcqQc3CSVctly30ORxdoovVGoF9TWi9IeQcP9wG562M
Standalone
export SS2S_LICENSE=<your license key>
spreadsheet2site-osx build -sheet <sheetId> templates/ -output <output file or dir>
The binaries are in the bin folder of the Spreadsheet2site bundle. The CLI supports OSX, Linux, and Windows.
Note: When SS2S_LICENSE is empty, the app runs in trial mode.
Using the Netlify Template
Netlify supports site deployments via templates in a GitHub repository. A template for our spreadsheet sites comes bundled with the package.
Use the Deploy to Netlify button in the README.md file in the local docs (inside the download) and follow the instructions to connect your Sheet with the Netlify app.
Deploy
Once you built your shop with the standalone version, you need to upload the page and your CSS and images to your hosting environment.
Or you can use Netlify and my deploy template (see the section above), and your site is live.

Conclusion
It’s straightforward to set up a small shop from a single spreadsheet with spreadsheet2site, and, thanks to great free tiers on Netlifiy, you can host it even for free.
Get started now and build your first shop.